Sarah Robinson | Tips and Techniques
The Ultimate Guide to Popcorn Ceilings Removal, Painting & Cleaning

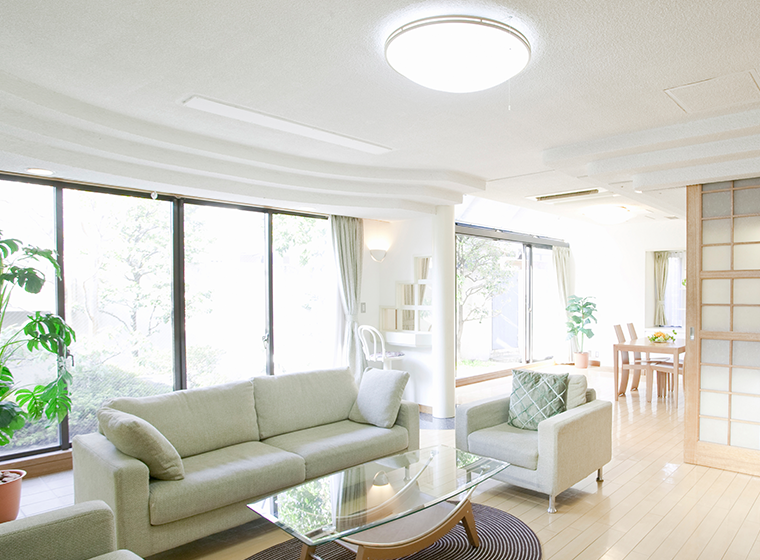
Ah, popcorn ceilings. These bubble-textured ceilings were very popular in homes built between the 1970s and 1990s and are still used in many homes. The unique textured finish is achieved by spraying on a mixture that looks like cottage cheese onto the ceiling and allowing it to dry. This look was used as a cheaper alternative to properly painting ceilings in all types of buildings, as the textured finish helped to hide imperfections and wouldn't require painting as often. Popcorn ceilings are also great for absorbing sound, which made them a popular choice in both homes and apartment buildings.
These days, many people prefer the more modern look of smooth or lightly textured ceilings. If you're ready to say goodbye to popcorn and achieve a sleeker look, there are a couple of ways to get rid of popcorn ceilings. However, it's important to keep in mind that it can be quite a difficult and expensive process.

How to clean popcorn ceilings
The biggest issue with keeping popcorn ceilings clean is dust. Textured ceilings tend to collect dust, so you'll want to clean the surface before you do anything. A microfiber duster or vacuum with a brush attachment should do the trick. If you have some staining on the ceiling, use a small amount of liquid cleaner and a soft cloth. Be sure to test out a small patch first, as sometimes the texture can disintegrate when it gets wet.
How to remove popcorn ceilings
There are a couple of ways you can remove or change the texture of your older popcorn ceilings. Let's take a look at a couple of the most popular methods.
1. Scrape it off
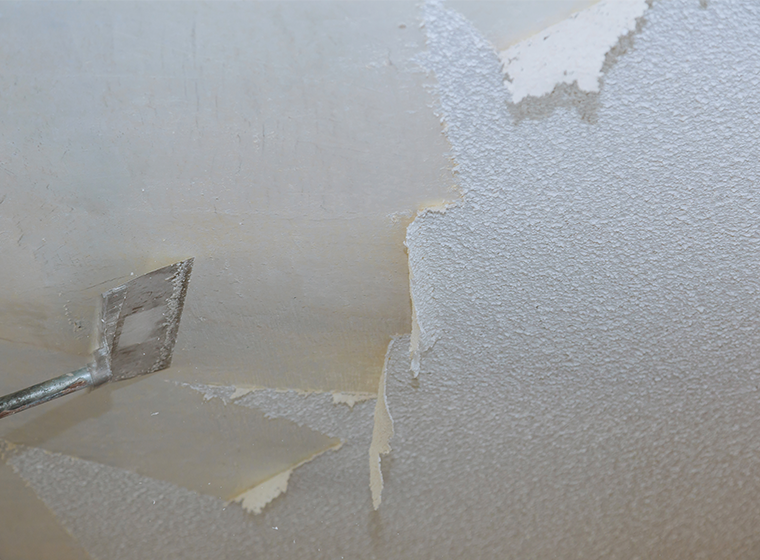
Scraping is the most time-consuming method, but it's also probably the most popular. It can be slow and messy work, but it's the most cost-effective and doesn't necessarily require a large team of people. (You could do it all by yourself if you wanted to, but it would be a very long job!) Before beginning the work, it's important to note that popcorn finishes and paint applied before 1979 often contained asbestos and lead. Both these substances can be toxic if they become airborne. If you have an older home, consult with an expert about testing your paint for lead and testing for asbestos. If you do end up with positive test results for either substance, do not proceed with scraping the ceiling.
Once you're ready to get started, you'll need to gather your tools: a putty knife, 4-inch utility knife, and a 6" or wider floor scraper. You'll also want to make sure you cover all surfaces with drop cloths (plastic sheeting works well) as things will definitely get dusty. For this same reason, you'll want to make sure you wear a dust mask as you work. To begin, you can either scrape the ceiling while dry, or gently mist it with water to loosen things up. From there, it's a matter of slowly and carefully scraping the surface, working in small sections around the room until you're done.
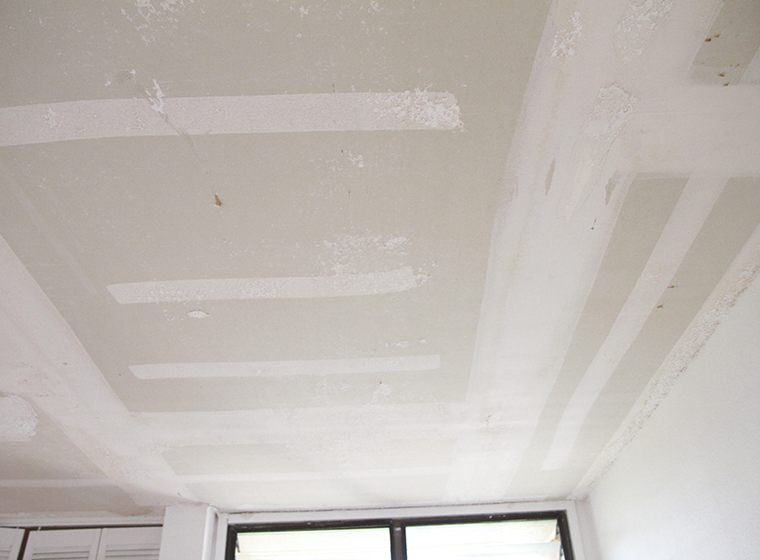
Before painting it over, you'll need to sand it down, apply some drywall plaster, and then sand it again to ensure a perfectly smooth surface. It's a lot of work and can be tricky to do correctly, so it's always best if you can hire popcorn ceiling removal professionals to take care of it for you.
2. Cover it with a new texture
If a completely smooth ceiling isn't the right look for your home, you can also look at creating a different kind of textured ceiling. However, creating a new finish does still require some prep work. First, the ceiling will need to be cleaned and prepped with quick-set drywall mud. Once dry, a bonding agent (such as joint compound) will need to be applied, and then the finishing texture can go on top of it. Before getting started, it's a good idea to get a contractor or other expert to take a look at it, to ensure the ceiling is sturdy enough to handle the extra weight of the new materials needed to cover the popcorn finish. It's possible that adding more compound could be too heavy and cause the ceiling to come down.
How to paint popcorn ceilings
Since it's a lot of work to fully remove a popcorn ceiling, it's often easier just to paint over it and keep the texture. Before you get started, you'll need to get the room ready. It's likely that paint will drip since you're painting a ceiling, so make sure you cover all the floors and any furniture or other items with dropcloths, and tape or mask off any fixtures or ceiling fans.
You'll also probably need to buy extra paint. Textured surfaces typically need more paint to ensure full coverage, so you'll likely need double the regular amount you would usually need. This is something to keep in mind if you're hiring professionals to paint for you, as you'll need to budget for more paint than normal. If the ceiling is currently unpainted, you want to use an oil-based ceiling paint to get the best results. You can tell if your ceiling is unpainted by simply running your fingers over it. If the popcorn crumbles as you do this, it is unpainted.